Pelmeni are the go-to dish for Russian women making a quick dinner on busy days; something every poor student lives off for at least a week at some point of his life; and what you’ll find in a freezer of every Russian bachelor.
Russian pelmeni recipe might remind you of Chinese dumplings and Italian ravioli as they are, too, made of ground meat wrapped in unleavened dough and boiled.
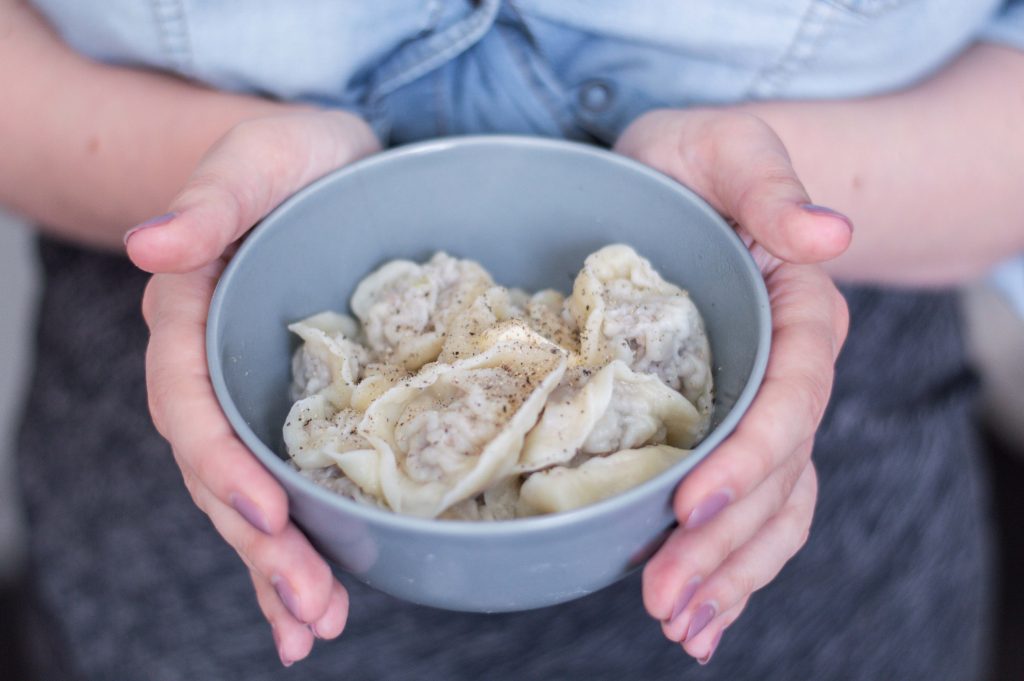
A Few Facts About Russians and Pelmeni
- The best pelmeni are homemade, but nobody’s got time for that. Mostly, people make pelmeni at home for big celebrations like New Year. Otherwise, we get a pack at the grocery store.
- Pelmeni are a must on New Year’s table. The whole family gathers on the evening of the 30th of December to make hundreds of pelmeni while watching a Soviet comedy and chatting. Usually, it’s a factory-like process with, say, a father cutting out rounds of dough, while a mother and a grandma fill them up with meat and seal the edges.
- Traditionally, the filling is made of three kinds of meat: beef, pork and lamb. Nowadays, though, you can find beef and pork mix, beef alone, and even ground chicken. If the filling is anything else, but meat (potato, cottage cheese, mushrooms, cherries), you call it vareniki.
- The choice of sauce for pelmeni is as important and sacred as choosing your religion. There are mayo lovers, mustard devotees, people who prefer their pelmeni with diluted vinegar, some like it with sour cream, others place a piece of butter on top (me! me!) or horseradish sauce on side. There are also weirdos who have it with ketchup (please, don’t be gross).
- Pelmeni are a regular item on the menu of both cheap student canteens and upscale restaurants.
Why You Need Pelmeni in Your Life
Pelmeni, or Russian dumplings, take a lot of time to make. But once you stuffed the freezer with a few kilos, you only spend minutes to prepare a dinner on a busy night or set a table for unexpected guests.
But Where Do Pelmeni Come From?
Theories on origins of this dish are so confusing and contradictory that I am reluctant to cite any here. Most researchers agree, though, that the ancestor of pelmeni are Chinese dumplings.
Some believe that pelmeni were brought to the Ural region of Russia by mongols; others — that they were invented by Komi-Permyak tribes that inhabited the Urals and made their living by hunting.
I tend to believe the latter. What is easier to cook for a hunter who spends most of his time in the forest, but dumplings? They can be frozen, stored for months, then cooked in a few minutes. When Russians moved to Urals and Siberia they adopted the recipe.
Traditional Russian Pelmeni Recipe
When I started out making pelmeni, I looked for the most authentic recipe from the Urals, where I come from. One of the most thorough and detailed recipes I first found about five or six years back belongs to Elena Aizikovich. If you read Russian, jump to her blog and give her pelmeni a try.
Elena got the recipe from her nanny, who was a native Permyak — it doesn’t get more authentic than that. My recipe is adopted from hers, but after years of trial and error (and thanks to my wonderful readers’ suggestions) I made quite a few changes.
Unlike Elena, I took the easier road when it comes to filling. Even though I love cooking from scratch, the idea of grinding meat for pelmeni is still a little intimidating, so I use store-bought mix of beef and pork. I currently live in Germany, though, so the quality of meat is not something I ever worry about.
I also modified the proportions of the dough by increasing water to make it softer and easier to work with. Then, there are a few insignificant tweaks to the technique, but that’s inevitable as every woman finds her own way of mastering the dough.
The Dough
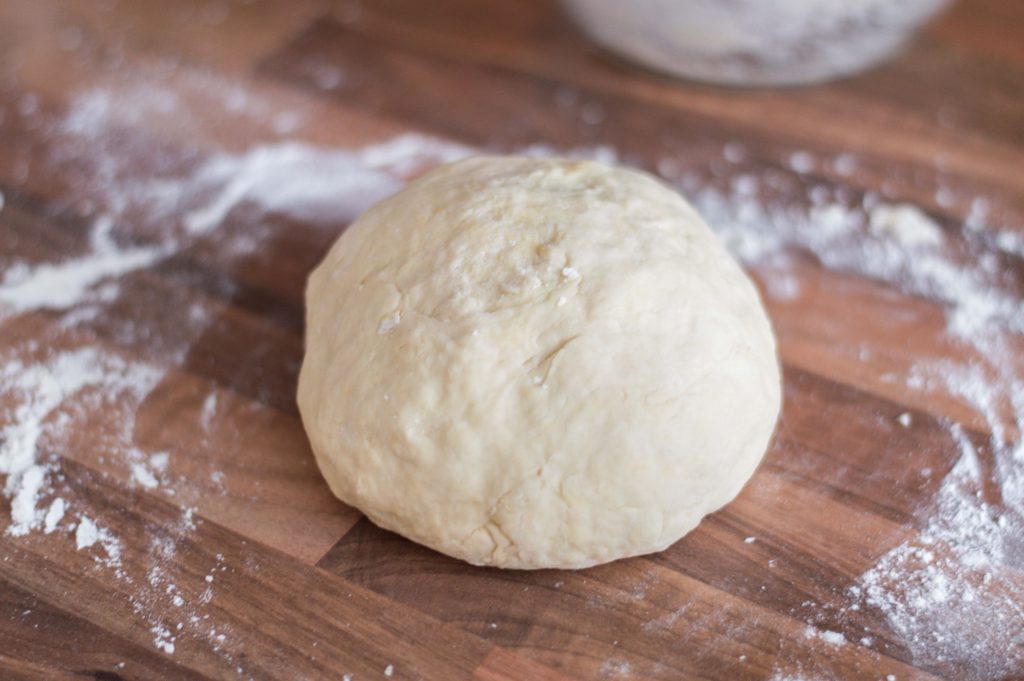
I strongly believe the dough for pelmeni should be simple; no funky business with adding sour cream, buttermilk or the like. In fact, it’s just a few ingredients: flour, water, eggs, salt. That is it.
Eggs make the dough elastic and easy to roll out. In the original recipe, Elena tells the story of how her nanny used the egg shells to measure water for pelmeni — in her recipe the amount of eggs equals the amount of water. However, I (and a few of the readers — check the comment section!) figured that these proportions result in firm dough that’s hard to knead, let alone roll out thin. As a result, the amount of water is increased in my recipe.
When you are finished kneading and proofing, the dough should be firm enough to not let water get inside pelmeni while they are being boiled, but elastic enough to roll it out paper thin.
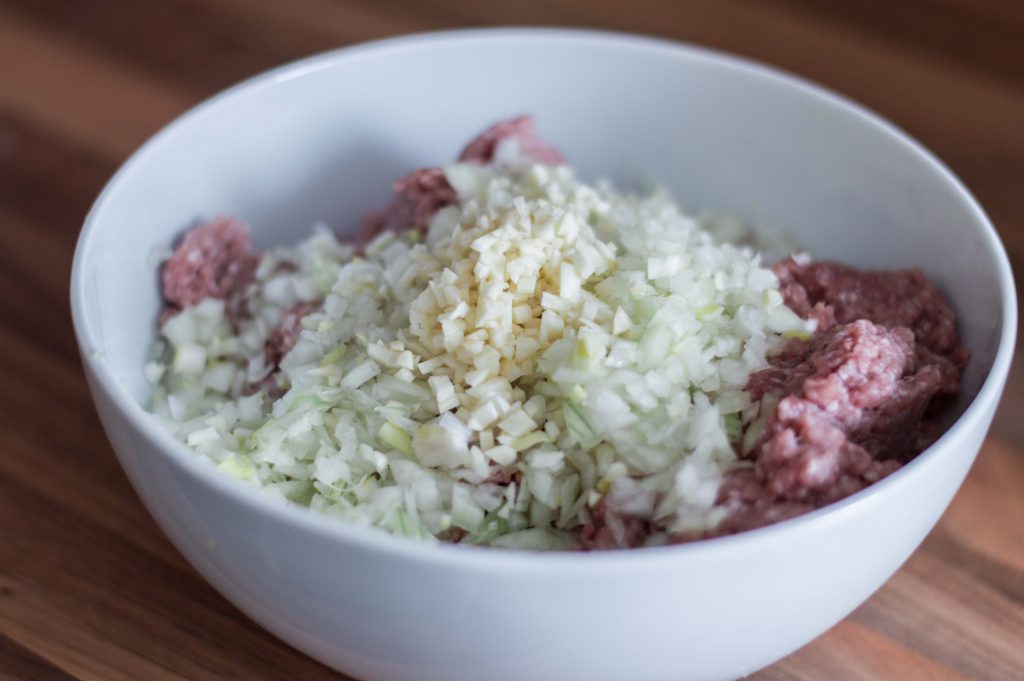
The Filling
As I mentioned earlier, my go-to is a mix of ground beef and pork in 1:1 proportion. I get it at supermarket. Sigh! I want to be one of those cool people who grind their own meat — and on those occasions when I make pelmeni with my parents I am! — but on my own I take the easy way of buying it.
The original Ural pelmeni are not made with ground meat. Back in the day, a wooden bucket and a sechka, a special mincing knife, were used. So the meat was not as much ground as it was chopped.
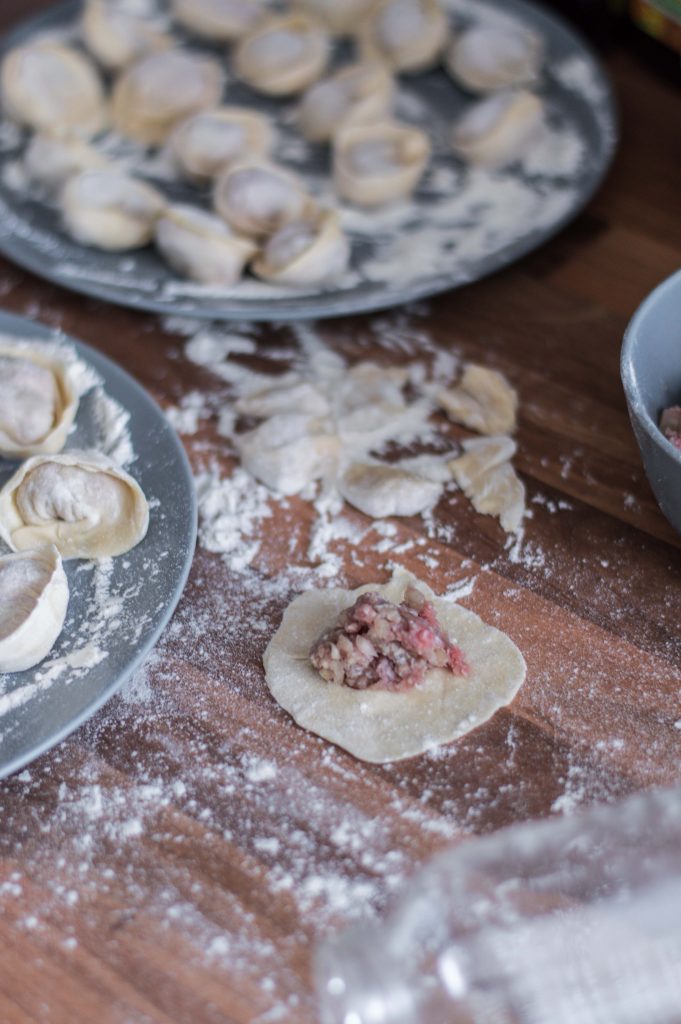
Working with Pelmeni Dough
The popular way of working with dough is to roll it out thin and cut out rounds with a wine glass. Easy-peasy. The right way, though, is to cut small pieces of dough and roll them into rounds individually.
While I may skimp on grinding meat on my own, I do spend a ton of time rolling out the dough piece by piece for each pelmen. The resulting pelmeni are not as uniform as the ones cut-out by a glass, but the dough comes out thinner and somehow softer.
There’s nothing wrong with using the faster method. If you are short on time, just go ahead and use a wine glass, I won’t judge you. But if you have a couple of hours, a willing-to-help family member or at least Netflix to keep you company, let’s do traditional Russian pelmeni the right way!
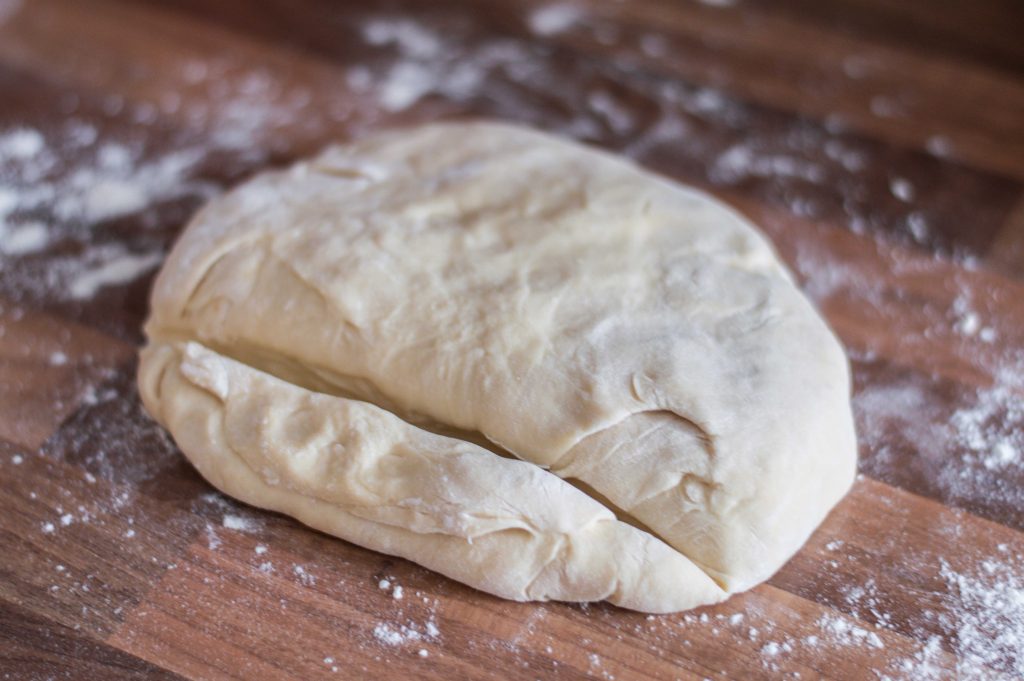
Once the dough is mixed, kneaded, and rested, cut out a strip and roll it to be about 2 cm (1 inch) in diameter.
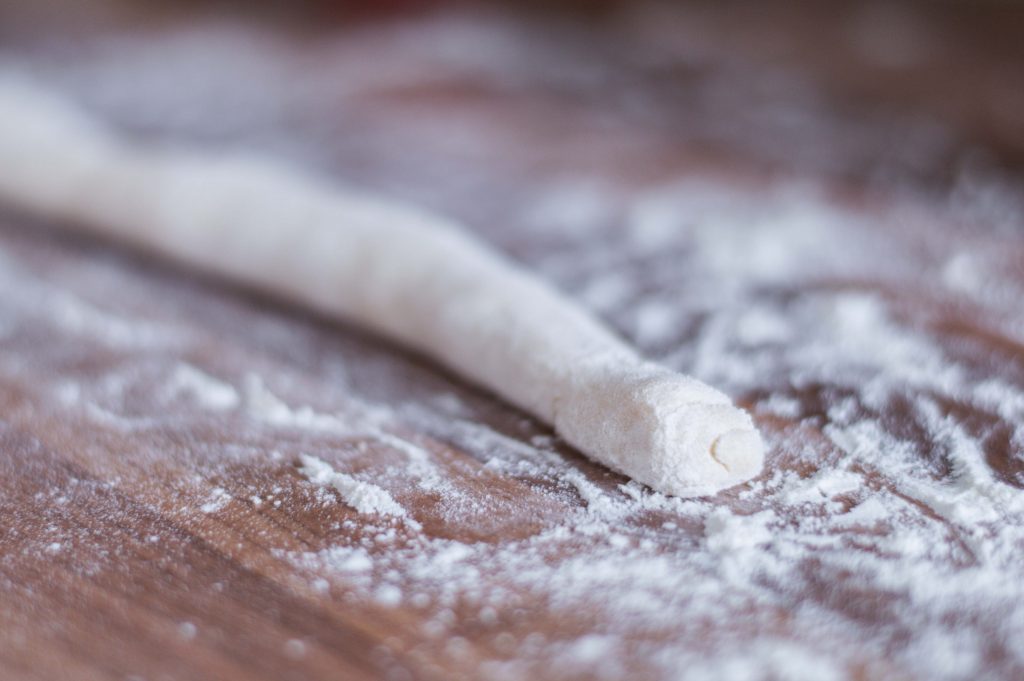
Cut the strip into 2 cm (1 inch) pieces and place them onto a floured surface in front of you.
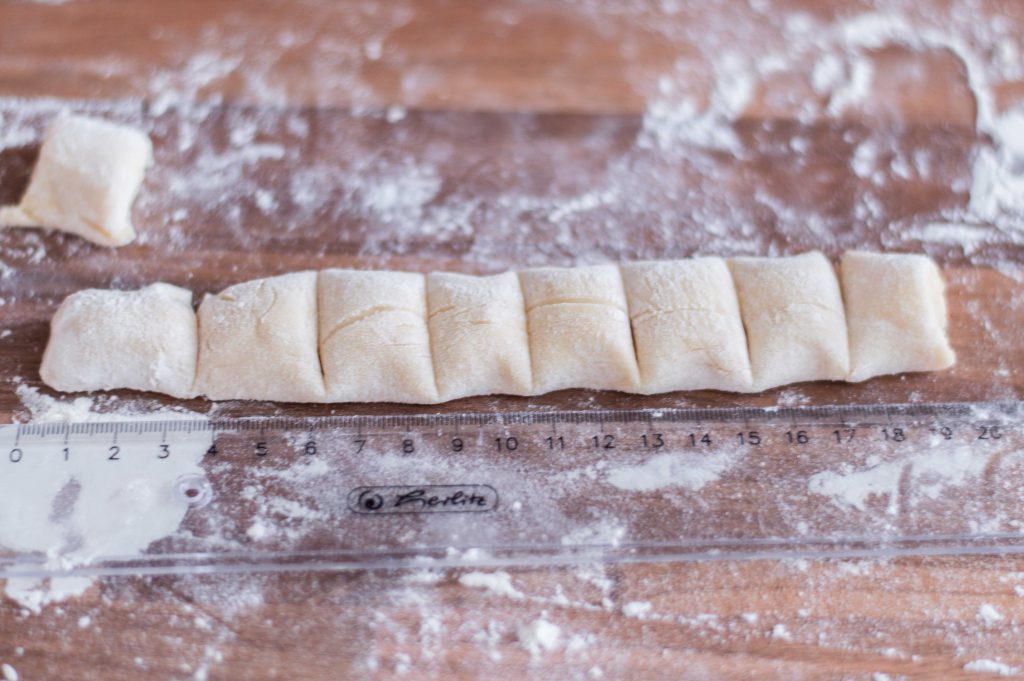
Note: you can go with 1.5 cm (half an inch) to make even smaller pelmeni which I absolutely love… to eat that is. But making them is gonna take even more time.
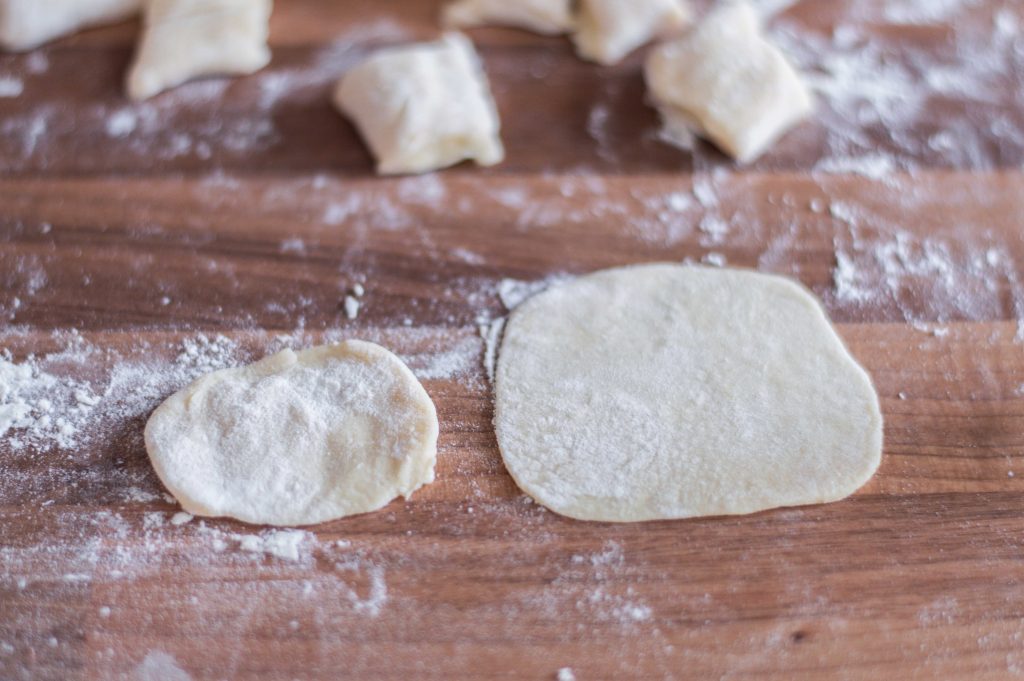
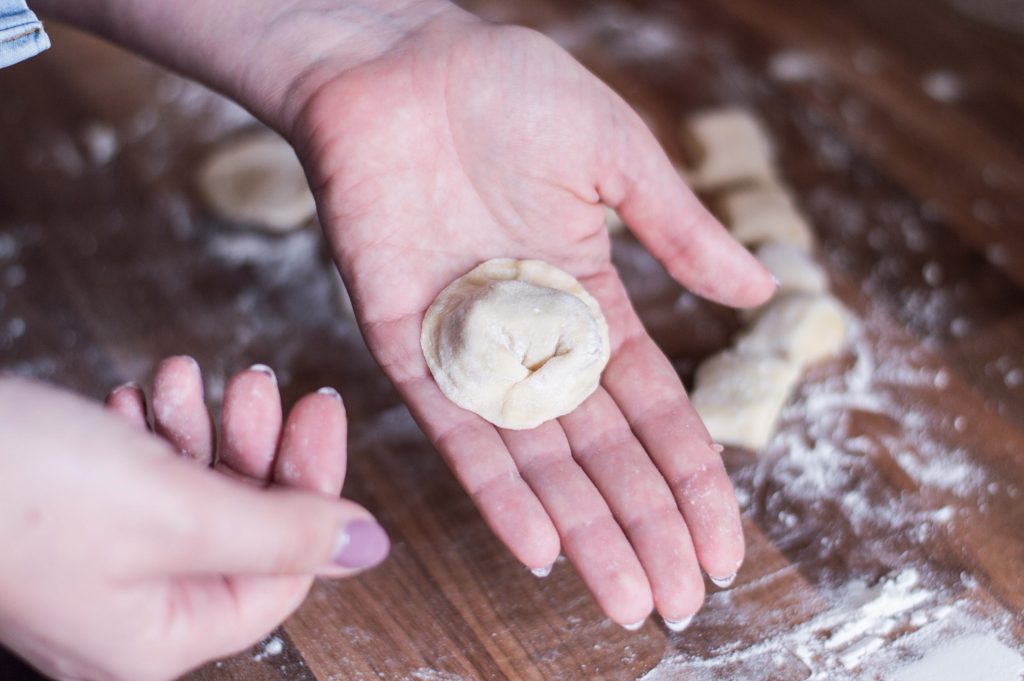
Make a round with your hands first (on the left), then roll it out with a rolling pin (on the right).
Take one piece at a time, press it down, and make a round using your fingers. Then roll it out with a rolling pin. The round should be about 7 cm in diameter with the dough almost transparent. Be sure not to overdo it, though, or it may rip while boiling.
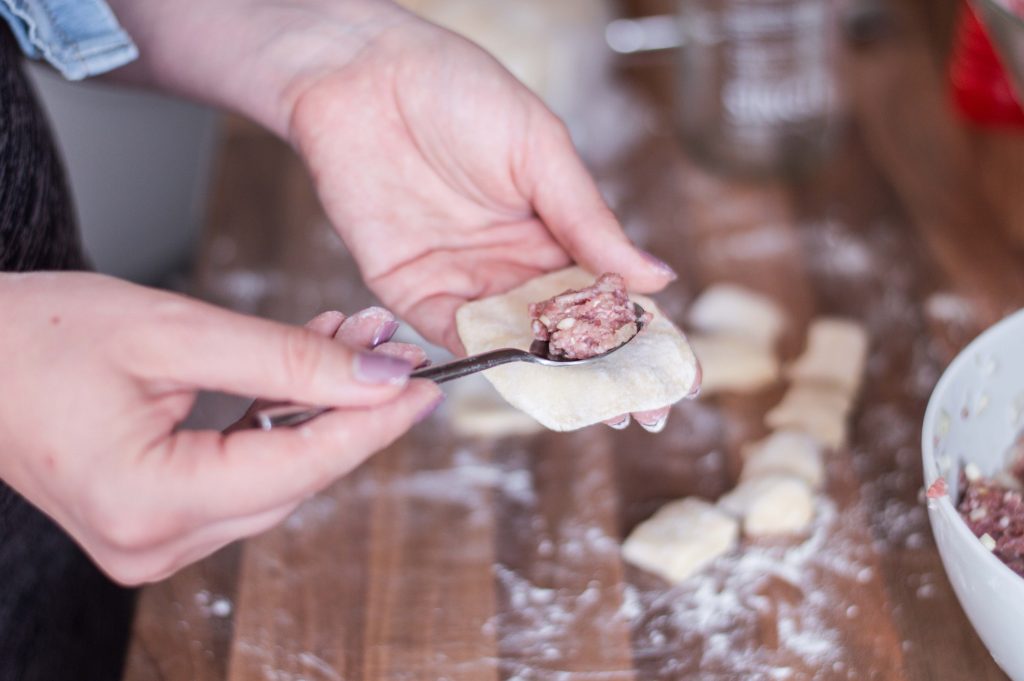
Hold the round in your left hand and place a teaspoon of the filling in the center.
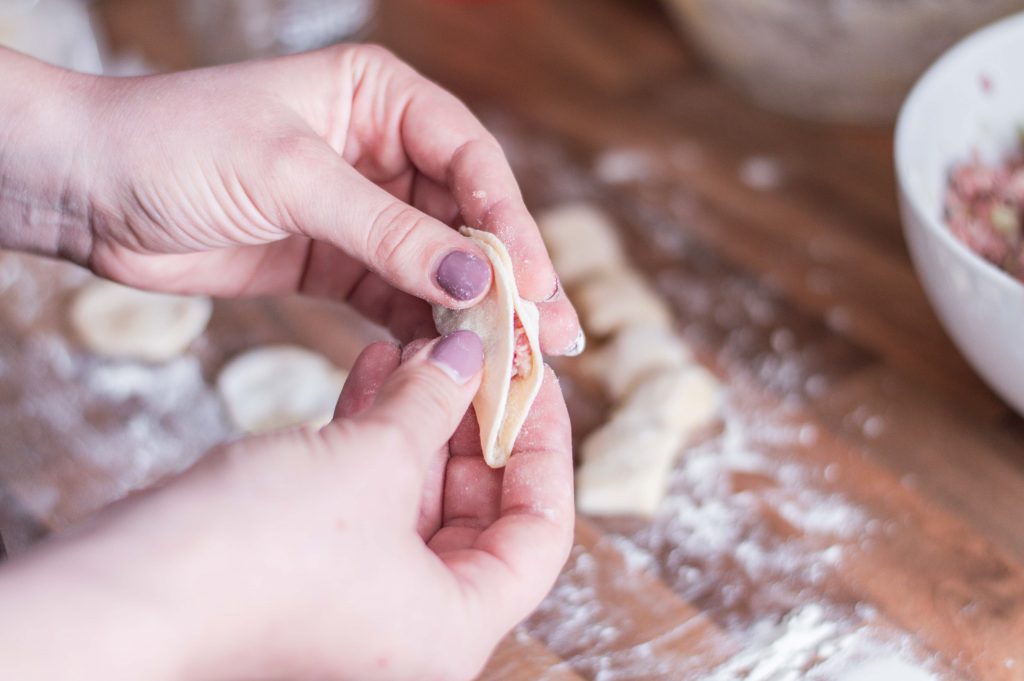
Cover the meat with the upper part of the round and start sealing the edges from center working your way down each side.
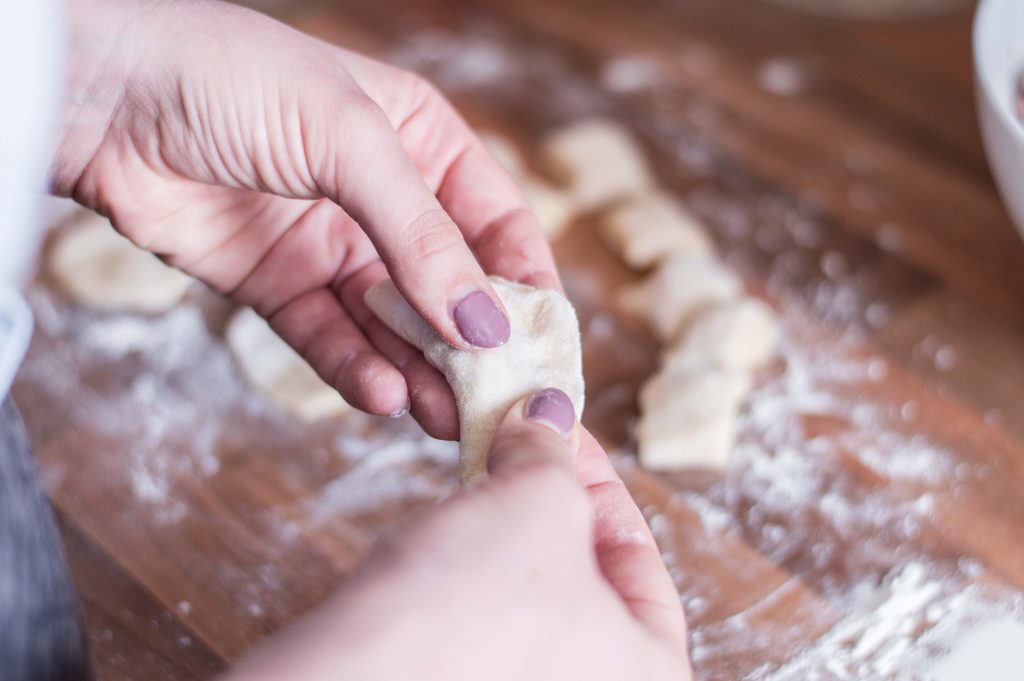
Then seal the ends together.
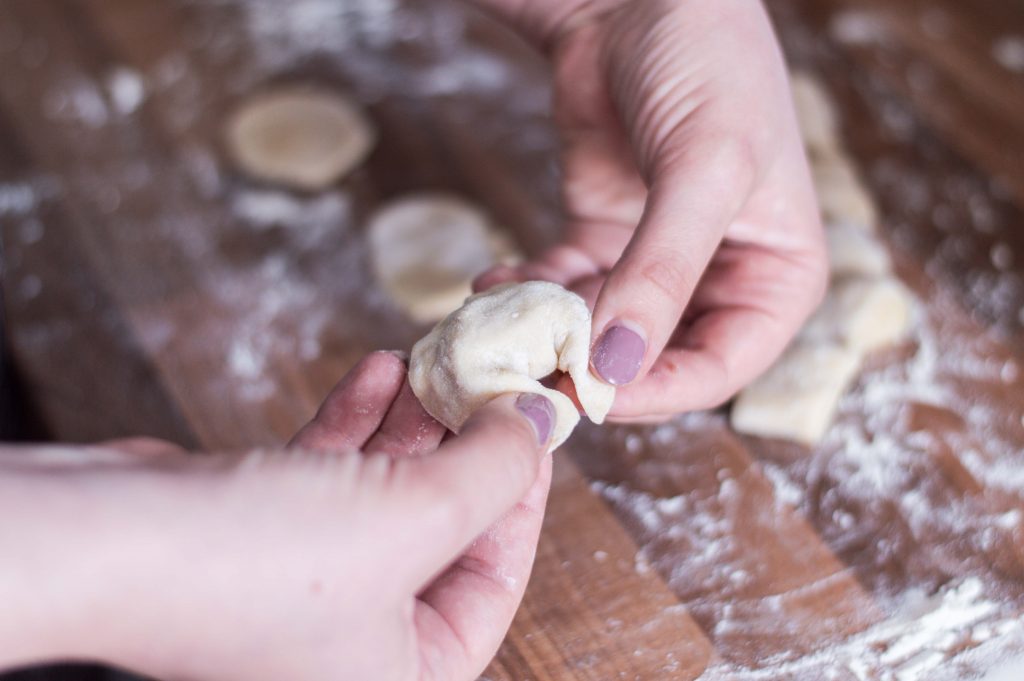
Gotovo! (Ready!)

Cooking Pelmeni
Boil pelmeni for about 8 to 12 minutes. If the dough is done right it should shrink during the boiling process, making “wrinkles” around meat. Make sure to generously salt the water and add a bay leaf.
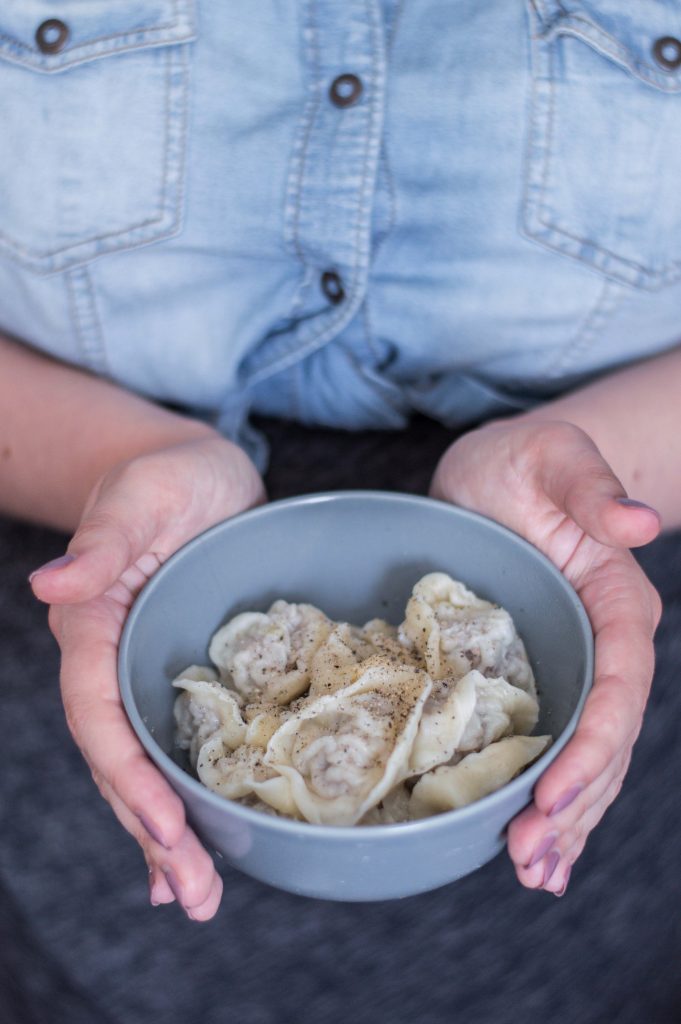
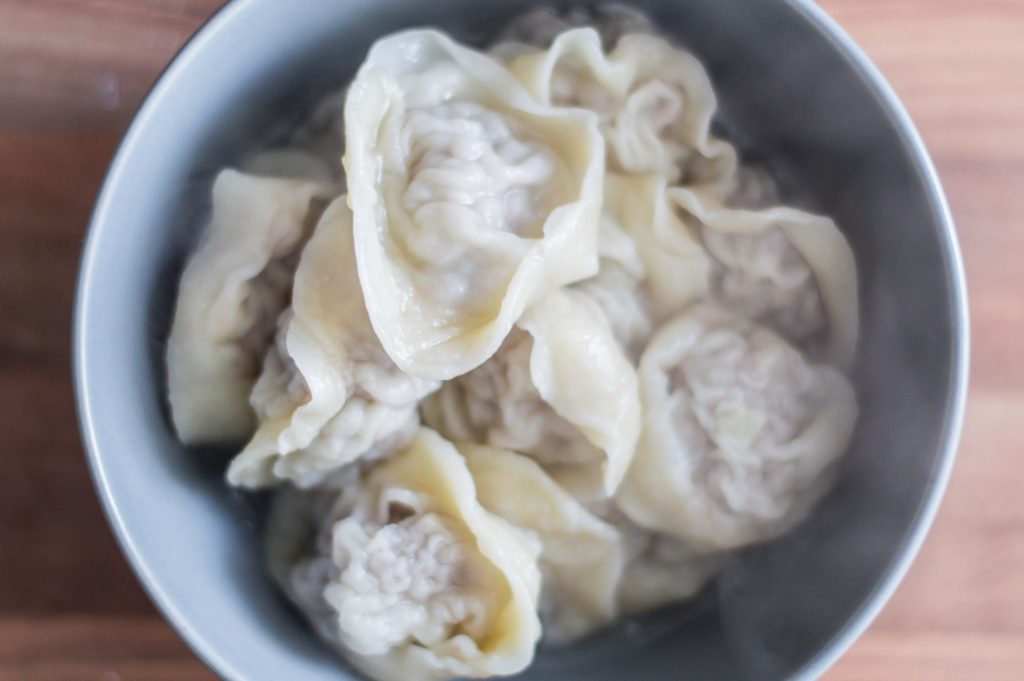
“Wrinkles” on the dough after boiling — a definite proof you made the dough right!
There are two main ways to serve pelmeni: either drain all the water or intentionally add some to the plate. The first method ensures that once you add butter or sour cream they will nicely “coat” pelmeni (as opposed to get diluted if there’s water left in the plate).
I, however, love the water! You can serve pelmeni in actual meat broth if you have some in your fridge or freezer (just a few tablespoons, it shouldn’t look like a soup). But the easiest way is to use the water you boiled pelmeni in. It’s quite fatty and aromatic.
Storing Pelmeni
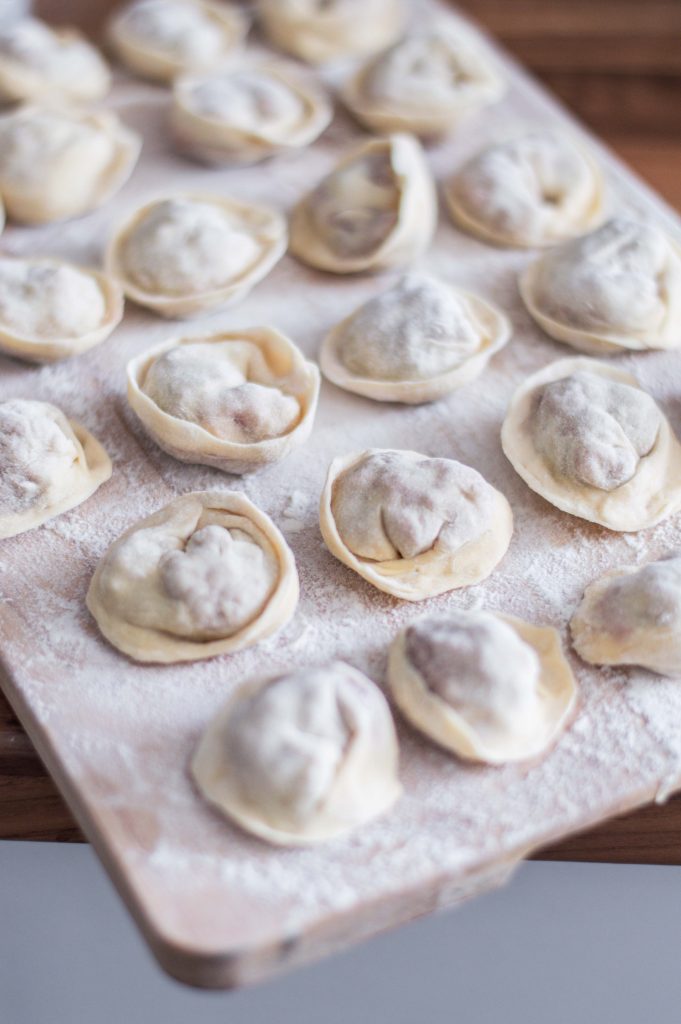
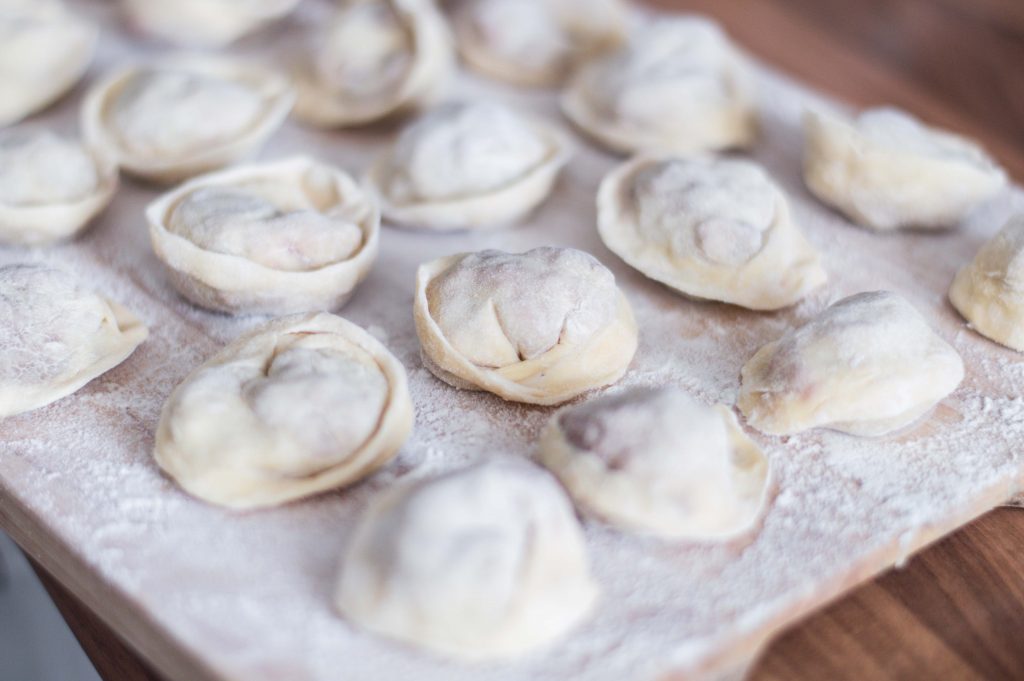
When you are making pelmeni, arrange them on a board dusted with flour in rows. You can also use plates or anything that will fit in your freezer. Once the board is full, place it in the freezer to let pelmeni harden, for at least half an hour. Then you can transfer them to a plastic bag and place the bag in the freezer.
If you put freshly-made pelmeni straight into a bag, they will stick together into a giant ball of dough and meat.
Russian Pelmeni
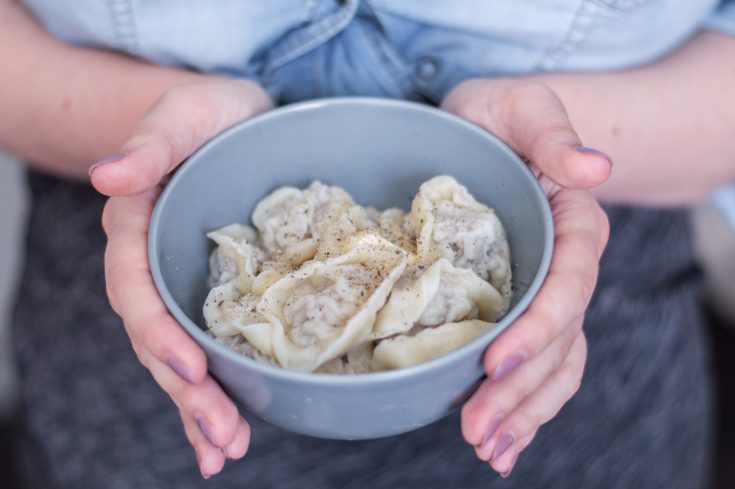
Traditional Russian pelmeni with beef and pork filling.
Ingredients
For the dough:
- 2 eggs
- 1 tbsp any vegetable oil (I use olive oil)
- cold water
- 500 g sifted flour
- a pinch of salt
For the filling:
- 1 kg ground beef and pork mix
- 2 small onions, peeled
- 5 garlic cloves, peeled
- 2 tsp salt
- freshly ground pepper
For cooking:
- water
- salt
- 2 bay leaves
Instructions
Making the dough
1. Crack eggs into a bowl and add oil.
2. Add cold water to eggs and oil so that the total weight is 300g (2 eggs should take up approximately 100g + 10g for oil).
3. Place sifted flour into a separate bowl and make a hole in the center. Pour egg mixture in.
4. Mix the dough with a mixer for 10 minutes using dough hooks.
5. When all the wet ingredients are mixed in and the dough forms a ball, place it on the table dusted with flour.
6. Knead the dough with your hands until it stops sticking (shouldn't take more than a minute or two).
7. Place the dough in a bowl, cover it with a damp towel and leave to rest for at least one hour. After resting the dough will become softer and easier to work with.
Making the filling
1. Chop onions and garlic cloves finely. Any big pieces might rip the dough.
2. Mix ground meat with onions and garlic.
3. Add salt and pepper and mix well.
Assembling pelmeni
1. Cut a strip of dough and roll it into a cylinder approximately 2 cm (1 inch) in diameter. Tip: keep the rest of the dough covered to prevent it from drying.
2. Cut the cylinder into 2 cm (1 inch) pieces and place them on the table dusted with flour in front of you.
3. Take one piece at a time, press it down and stretch with your fingers to make a round. Then roll it with a rolling pin to be about 7 cm (almost 3 inches) in diameter. You want it to be as thin as possible for better taste. Be careful not to roll it too thin, or the dough will break when you boil pelmeni.
4. Hold the round in your left hand (shake off any execess flour) and place a teaspoon of filling in the center.
5. Place the upper part of the round on top of the filling and start sealing edges. Start from the center and work your way down one side, then the other side.
6. Seal the ends of pelmeni together.
7. Repeat to the rest of the dough. Place pelmeni in rows on a board dusted with flour. Once the board is full, put it in the freezer until pelmeni are hardened. Then take it out, transfer pelmeni to a plastic bag. Put the bag back into the freezer.
8. If you want to have your pelmeni right away, you can boil them fresh, without freezeing.
Cooking pelmeni
1. Fill a pan with water and bring it to boil.
2. Add salt (1 tsp of salt for each 1 liter of water).
3. Place desired amount of pelmeni into boiling water (about 10-12 per person). Don’t be tempted to put a lot at once. Keep it down to 25 pieces at a time. Immediately mix them with a slotted spoon to make sure they are not stuck to the bottom. After you add pelmeni to boiling water, the water will cool down and you will need to wait for it to boil again.
4. Mix pelmeni carefully from time to time untill all of them come up to the surface. Then cook them for another 3 minutes,
5. Take pelmeni out using a slotted spoon. You can add a few tablespoons of the water they were cooked in to the plate.
6. Serve immediately. My go-to is a piece of butter with lots of freshly-ground black pepper on top of pelmeni. You can also serve them with sour cream, mayo or mustard.
Pin for later:



What kind of flour is the best for pelmeni? I used a cheap all purpose flour to make the first batch and they turned out perfect. The flour for the second batch was the fancier king arthur all purpose flour and the dough was actually no wear as good. Can you express your personal opinion and why a lower gluten (bleached) flour worked better for boiling?
I am glad you tried out the recipe! Here’s the thing: unlike in USA, in Russia we don’t have many varieties of flour. That’s why if you Google recipes for pelmeni in Russian, you won’t find any specifications, it’s just “flour”. Now that I live in USA, I always get unbleached white flour just because I find it healthier than bleached flour. But in my experience the price never played a role in the outcome. I usually use Bob’s Red Mill white unbleached flour, but I used cheaper brands and they worked just as well.
You should use winter wheat flour, if possible. In the end, whole grain organic flours are as traditional as it gets.
Thank you for the input! 🙂
You’re welcome.
And thank you for this nice website.
I used pizza type flour. I find it perfect fo any kind of dumplings.
I should try that! In Russia, we usually buy pre-made fresh (not the frozen kind) pelmeni dough, so half the work is done. It was only after I started traveling that I began experimenting with making my own dough.
Yuilia: Will this dough recipe work with “pielmiennica” (that is Polish transcription from Russian)?
I have such “ustroistwo” (it’s heavy aluminium form with 36 round holes in it) from the ’80, my mom got it from a Russian friend, never use it, now i got it from her and wanna try. Do you have any practice with such a tool?
Hi Maddy! I think I know what you are talking about, I’ve seen this device, but have never used it. Actually, I am pretty interested to check out how it works. I think the dough recipe should work. If you make it that way, let me know how it goes! I am curious 🙂
Hello Yulia!
I have made pelmieni on my “pielmiennica”. The dough works well, BUT i must have dona some measurement modifications.
First -milliliter is volume measure, not weight. One large egg (EU standard) has indeed about 120 ml in volume but weight only about 100g . Eggs (especially whites) are less dense than water (pouched egg floats! Surprise!)
230 ml of egg and water mixture doesn’t work, there wasnt enough liquid to even make the dough come together.
I was adding water spoon by spoon and I can tell that 500g of flour needs at least 250-260 gram of liquid (plus tablespoon do oil)
But after adjusting the amount of water and working the gluten long and well the dough came out perfect, smooth and elastic, soft but not sticky. I have made about 200 pelmieni. They come out smaller than made by hand, so we ate half, and I froze half for future. as a delicious fast food 🙂
I would put a photo of my pelmieni here, but I don’t know how 😉
Hey Maddy! Thank you so much for taking the time to come back here and let me know how it worked out! I am happy you got great result in the end. Really appreciate your notes on the volume/weight of eggs, I will have to roll up my sleeves and try out this recipe once again to check the liquid to flour ratio!
Ok, now I see I also messed up a bit. 120 ml /100g is of course for 2 large eggs Sorry! We don’t have giant chickens here .
😉
One large egg is app. 60ml/50g .
Oh, and your granny’s method of measuring water with egg shells – not useful. The smaller the egg the less water added, that cannot work.
Also – even for large eggs still not enough water.
I am an amateur baker and in bread baking proportions water to flour are crucial, so I am a little obsessed with measurements 😉
From my experience the flour for most kinds of dumplings should be as white and fine as you can get, but unbleached.
I think for USA it’s “pastry flour” – German type 405, Italian “tipo 00”.
But all-purpose will do too.
Don’t recommend whole gain, because it contains bran. Bran is very healthy but even after milling is hard and has sharp edges, so it can cut the gluten strings during kneading process. And we want that gluten string in our dough to be long. 🙂
Agreed! Wholegrain flour wouldn’t work well here. Actually, I’ve never seen pelmeni made of wholegrain or any type of dark flour, it’s always white. Oh, and by the way, I’ve made manti recently with my mom and grandma which are in the same dumpling family as pelmeni, but bigger and you steam them instead of boiling and I have to say, you are right, the water wasn’t enough. I updated the recipe to 260 ml of water and going to try it out a few more times to make sure it work well! Thank you for the input 🙂
I’m glad I was helpful 😉
Sunday I will try your dough on traditional Polish pierogi with potato and white cheese filling (called “ruskie” which means “Russian” in Polish, don’t ask me why 😉 )
I think it will be better for frozen dumplings than my usual dough recipe.
I have to say, I just returned from my first visit to Moscow and fell in love with Pelmeni! I appreciate the time you took to explain the makings of such a delicious dish. The question I have is the serving. I was given my Pelmeni in a clear mushroom broth with a side of sour cream. Although I don’t know if this is very authentic, I wondered if you had any suggestions of where to find a recipe for the broth. It enhanced the flavor of the meat. Thanks again for such a great post!
Hey Matthew! Happy to hear pelmeni found a way to your heart! To be honest, I have never seen pelmeni served in mushroom broth. I’ve seen them served in little bit of meat broth, but never mushroom, although now that I think of it, it sounds like an awesome idea. I’ll ask a few of my Russian friends who are chefs, and if they know of a recipe I’ll let you know!
Hi there! How many pelmeni does this make please? We’re making them for international day at our school and need 600 pelmeni. Thank you!
Hi Tamara! Wow, that’s a whole lot of pelmeni! This recipe will yield 120-150 pelmeni depending on how big you make them. All the best with making 600. Hope there are quite a few people helping you! 🙂
Visited a local Armenian kitchen for the first time recently. Our fav Greek place had closed so we’ve been trying to find a new place in a small area. We tend to be open to anything new and different. They had pelmeni on special and I found it amazing! Looking forward to giving this recipe a go. I’m a big fan of Prep and freeze meals so this is right up my alley! Thanks for sharing some food love
Thank you, Kristin! Armenian food is amazing, we love it here, in Russia! Interesting that they had pelmeni as their special 🙂 Let me know how it worked out once you make your own pelmeni at home!
Hi! My husband is Russian and I have tried making Pelmeni a couple of times before, not always very successfully, after my mother in law taught me. I love the description you give with your recipe, so I am going to try it with your guidance this weekend. My question is this – is it possible to cook pelmeni and keep it warm, so that it can serve a big group of people over a buffet? Is there a best way to do this without the pastry going soggy or sticky? Thanks so much!
Hey Carrie! Yay for giving my recipe a try, hope it all works out well! As for serving, I never kept pelmeni after cooking (somehow it all gets eaten very quickly)), but if I had to, I would serve it in a big ceramic bowl (or any bowl that’s thick and keeps heat) with a lid. When you transfer all the pelmeni from the pan where you boiled them, add a a little bit of the water (that you used for boiling) to the bowl too. I’d also throw a piece of butter on the top it will help prevent pelmeni from sticking and will add a burst of flavor. Then cover with a lid. Hope it helps!
I grew up eating pelmeni with NOTHING BUT MAYONNAISE!! Thats all i will ever eat it with, anything else is like putting bumper sticker on ferrari, why would you do such a thing blin!! But on a side not have you ever fried them?? i would like to know if i should boil them first, then fry or just throw them frozen in the oil?? Please hurry with the response as i am terribly hungry right not and am staring at whole bag of frozen pelmeni!
Replying as soon as I read your comment! Hopefully, you still have some pelmeni left 😀 I’d definitely boil pelmeni first and then fry them. Russians never really fry pelmeni, but adding some butter and frying a dumpling till it gets golden and crispy never hurt anyone, so go for it! And yes for mayo! That’s the only way to go! You have to try the mayo made in my hometown, it comes in blue jars and is the best thing in the world!
Hi there! Do you have a recipe for potato filling?
Hi Luisa! I don’t have a recipe per se, but it’s really easy to make. I’d just boil potatoes (the amount depends on how many pelmeni you are making, but maybe around 5-6 large potatoes to start with), then mash them while adding milk and butter to make it creamier. Don’t forget about salt too, you can add it to water while boiling potatoes, and then adjust the salt while mashing potatoes. That’s it 🙂
Hello! In the recipe it says, “When you finish making pelmeni, place them into the freezer”. Is this just for storage purposes or do they need to frozen before cooking?
Thanks!x
I just realized after reading your comment that I’ve never tried cooking pelmeni right after making them. Probably because we usually make pelmeni for special occasions and keep them in freezer until day X 😀 I would assume, if you can boil ravioli right after making them, you can do the same to pelmeni. I need to try it next time 🙂
Do you have any idea how much fat % to add for the beef/pork mixture? I am assuming 80/20?
I want to grind my own meat and based on my experience with chinese dumplings, super lean mince is best avoided.
Hi Terry! Great idea to grind your own meat. When my mom and I make pelmeni, we use 1kg beef, 1 kg pork, and about 400 g of salo (cured pork fat). So yes, that makes it about 20%. Happy cooking!
I use a macaroni machine to roll out my perohay dough. Will it work with this dough also…the ingredients are similar except I don’t use any eggs.
Hi Judy! Sorry for my late reply!
I’ve only ever rolled out the dough by hand, so can’t say for sure. But I’d give it a try! Let me know how it goes if you do!